This is part two of my RDP series on how to protect the communication, minimize the credentials exposure and how to use it in different delegation models.
This time we will have a look at an interesting delegation model using RDGW and RDP Restricted Admin mode.
I want to have a user dynamically/temporary member of an admin group. I don’t have JIT or JEA implemented so what can I do with built-in tools in the OS platform?
With RDPRA we have the possibilities to be a special admin depending on which server we jump to. It can look something like this:
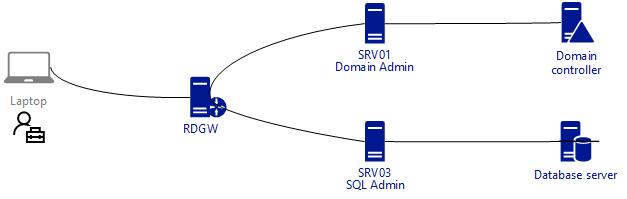
In this example, we will grant a user Domain Admin rights temporarily, and in other cases he will just be a regular user.
In part one I wrote about RDPRA and how it flips the users identity to the servers identity he logon to. If a user RDP to a server with Restricted Admin mode, he will thru that machine connect to other resources in that context. If we make that server a member of Domain Admins the user will become a Domain Admin only by landing on that machine, and it happens automatically only thru RDP.
So, we start with stealing the setup from part one and add the server to Domain Admins group. Now when my user Tony connects to the server he is effectively a Domain Admin.
Sure, we need to step up our game on logging and correlations of event logs to get a clear picture of who did what. This isn’t about Auditing, so I will save that for some other time.
Regular user on client:

Local Admin on Server:
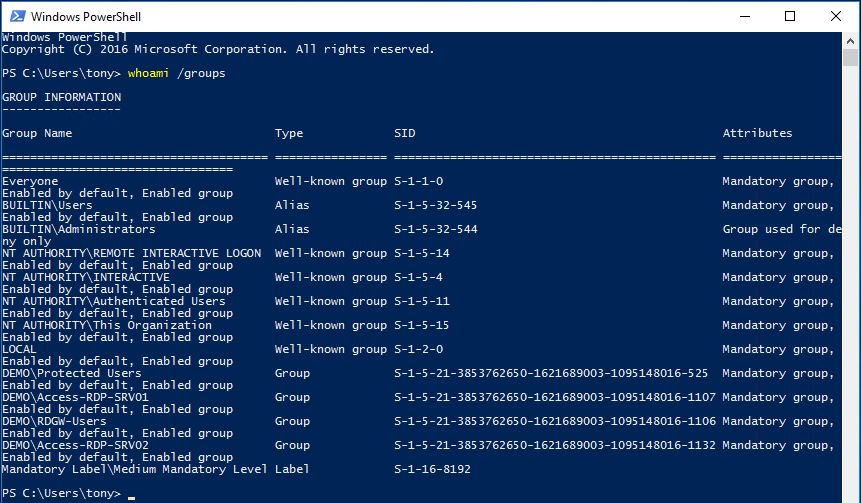
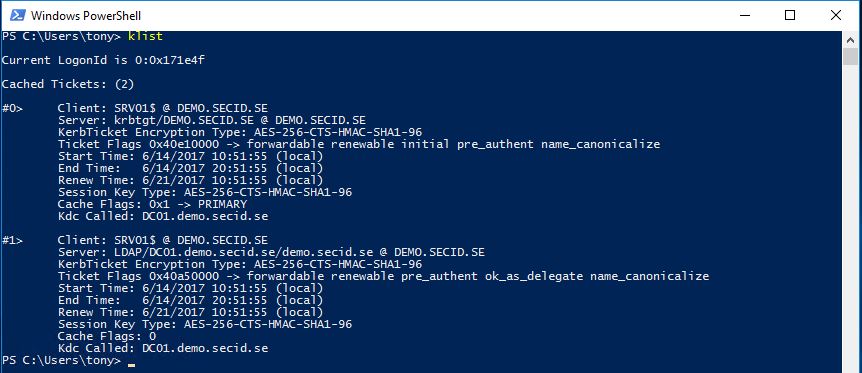
Kerberos tickets for the server:
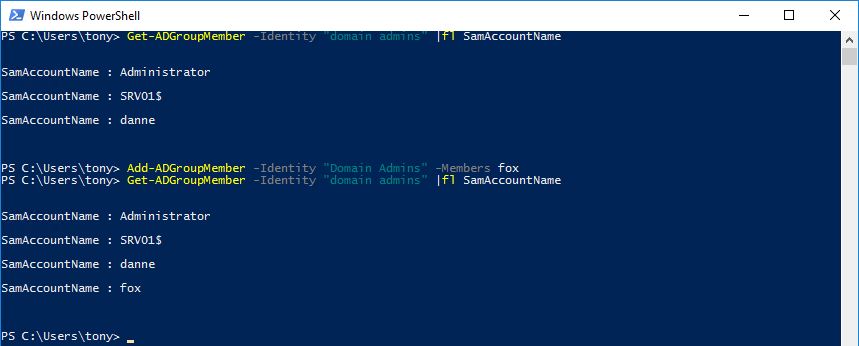
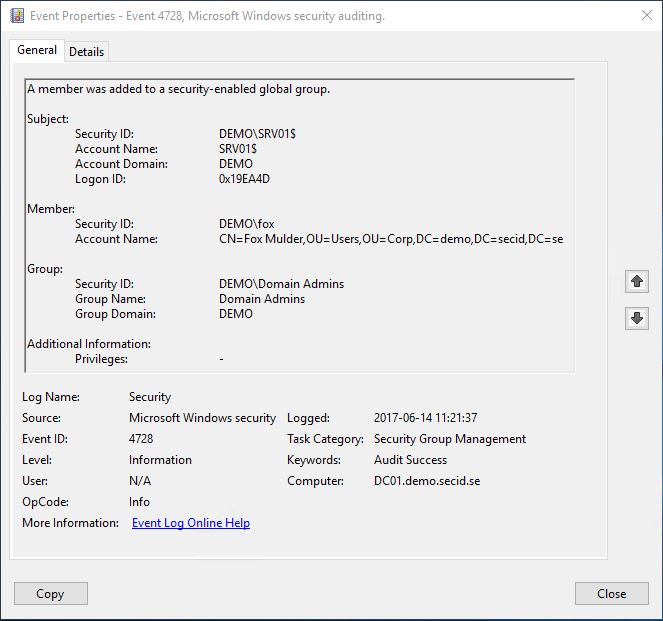
Can modify Domain Admins membership:
Security event log in AD:
That’s cool, depending on where I am my identity and access changes. With this, we maybe want to add a few more layers to protect this machine. So, how can we make this stronger?
We can strengthen this in many ways and we start with a little closer look at the RDGW setup.
Remote Desktop Gateway
Remote Desktop Gateway (RDGW) enables authorized remote users to connect to resources on the network. It transmits RDP traffic to port 443 by using an HTTP SSL/TLS tunnel. It provides a comprehensive security configuration model that enables you to control access to specific internal network resources. With this you get a point-to-point RDP connection, rather than allowing remote users access to all internal resources.
With this security configuration model, we can configure authorization policies to define conditions that must be met for the remote users.
- Control by user group memberships who can access resources
- Control by computer group membership resources users can connect to
- If the Client computers needs to be member of a certain group
- Allow or Deny device redirection
- And authentication methods
The setup of a RDGW is quite simple.
Install-WindowsFeature -Name RDS-Gateway -IncludeManagementTools
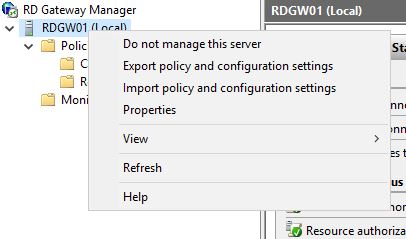
Enroll a v3 Web certificate from your internal PKI. Open the RD Gateway Manager tool and right-click the server name and choose properties.
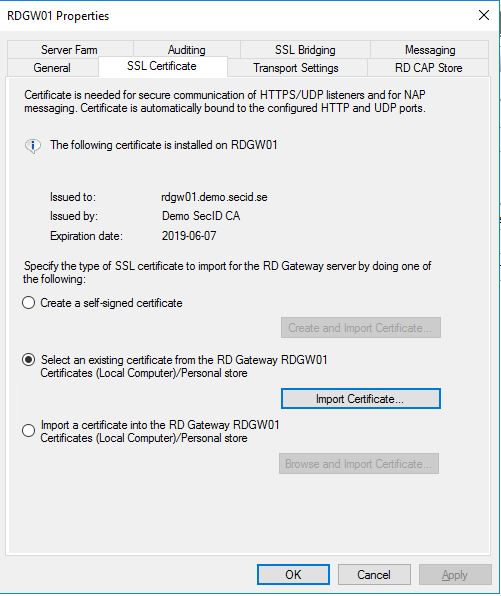
Go to the SSL Certificate tab and import your web certificate. Then go to the SSL Bridging tab and choose Use SSL Bridging and the first alternative HTTPS-HTTPS bridging. Then apply the changes and close the properties window.

In the Policies section, we first have Connection Authorization Policies where you can configure who can connect to the RDGW.
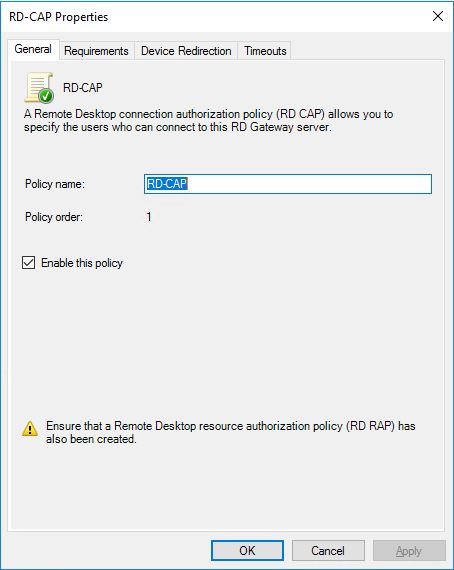
Create a new custom policy, in the General tab give it a proper name and enable it.
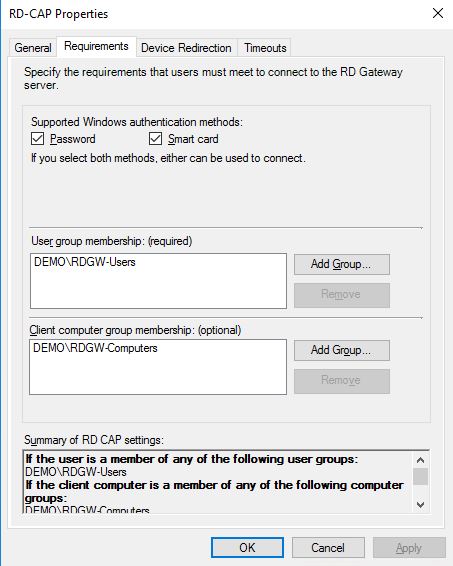
In the Requirements tab, we can specify the required conditions to being able to connect. In this case, the user needs to be a member of the DEMO\RDGW-Users group and the computer they use must be a member of the DEMO\RDGW-Computers group. We can also specify if they can authenticate with password or smart card.
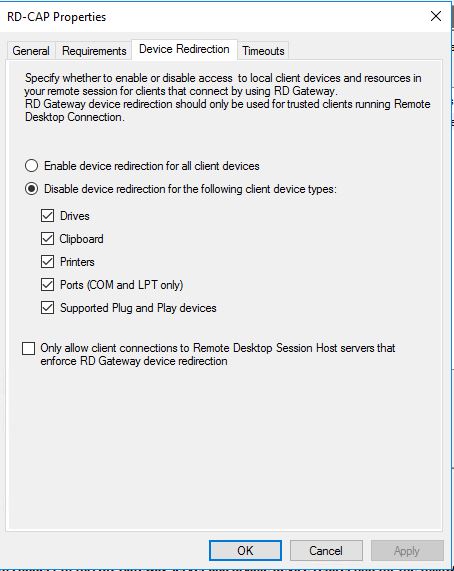
In the Device Redirection tab, we can deny all the redirections or allow some, in this case we deny everything.
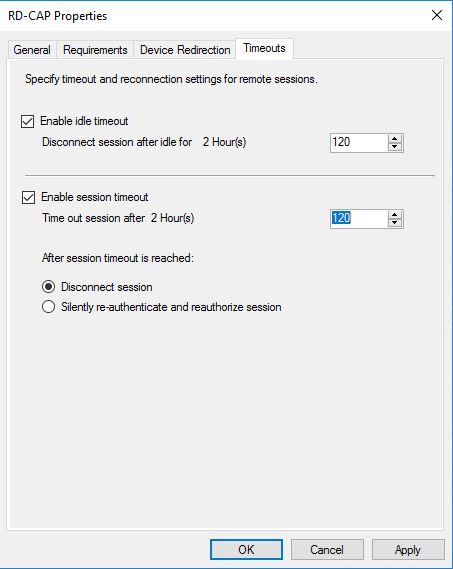
And last in the timeouts tab we can configure the session timeout limits and if the session should disconnect when reached.
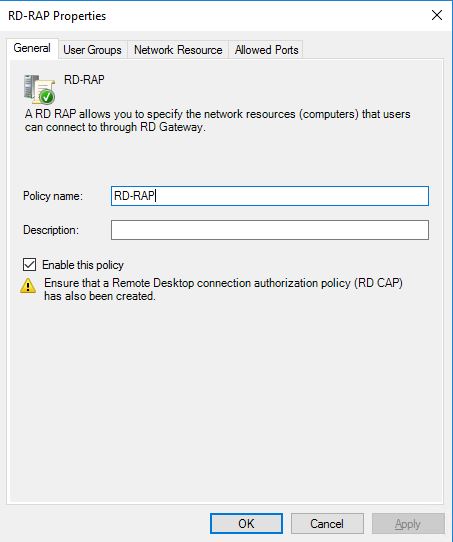
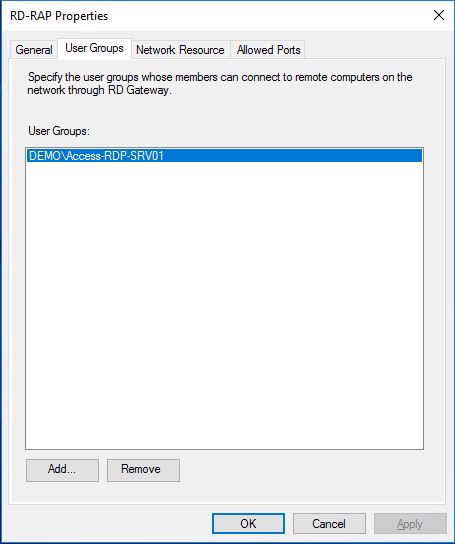
When done, go to Resource Authorization Policies and create a new custom policy.
In the General tab give it a proper name and enable it.
In the User Groups we add the DEMO\Access-RDP-SRV01 group and the users who is a member of this group will be granted access to the specified network resource in the next tab.
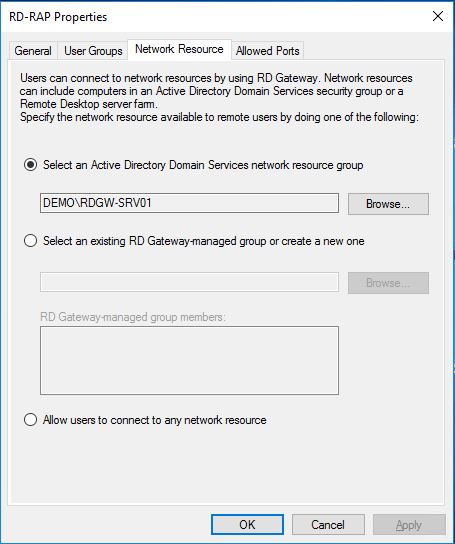
In the Network Resource tab, we add the group DEMO\RDGW-SRV01 with the server the users will be allowed to connect to. We could also create a RD Gateway-managed group if we don’t want to be dependent on Active Directory group memberships for the resources.
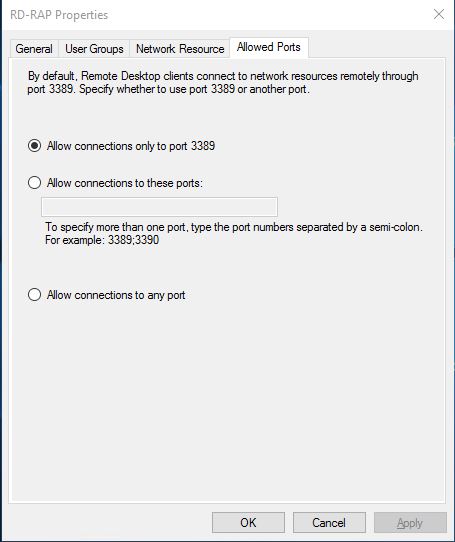
And last, we have the Allowed Ports tab if we want to use a different port connecting to the network resource.
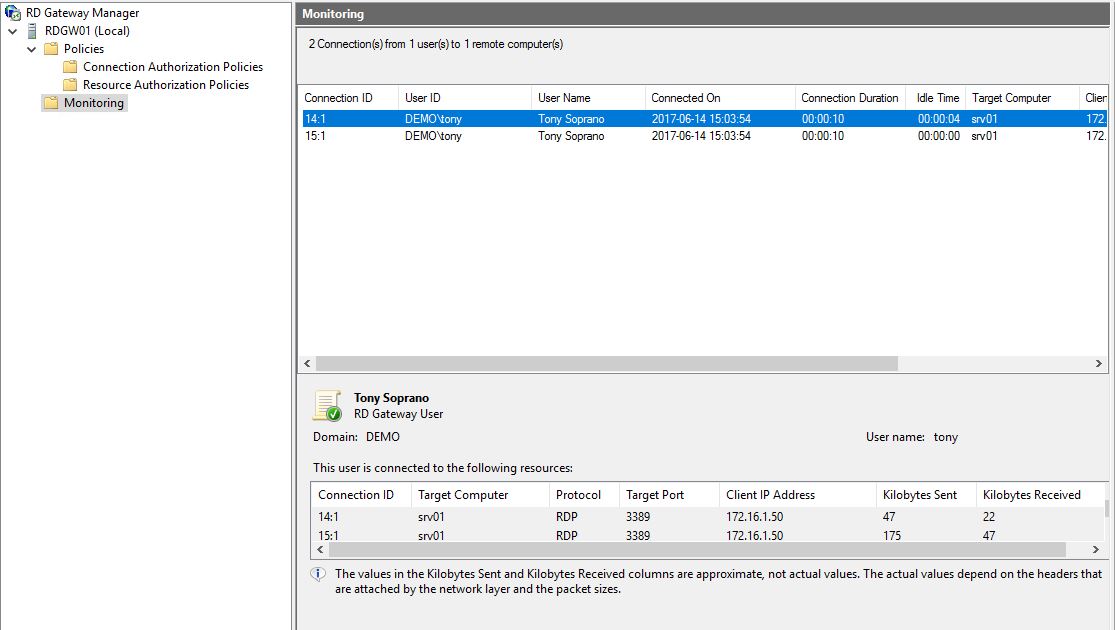
With this simple setup, we have specified who can connect to the RDGW, from which computer and to which resources he will be allowed to connect to thru the RDGW. We can easily add more rules to different servers. And we can see all the connections in the Monitoring.
To enforce this in a better way we will also configure the local firewall on the involved machines.
Server and Domain Isolation (SDI)
With the built-in Windows Firewall with Advanced Security we can deploy domain isolation and require that all incoming connection requests and subsequent data be authenticated and protected by using IPsec. IPsec protects traffic from address spoofing, data injection, session hijacking, replay attacks, etc.
With this enabled we ensure only Domain Members can communicate with each other and we can specify who and on which port. Optionally we can also require packet encryption.
To read more about SDI: Introduction to Server and Domain Isolation
Deploying a Basic Domain Isolation Policy This can be configured using Group Policy, in this guide we will do it locally on every machine.
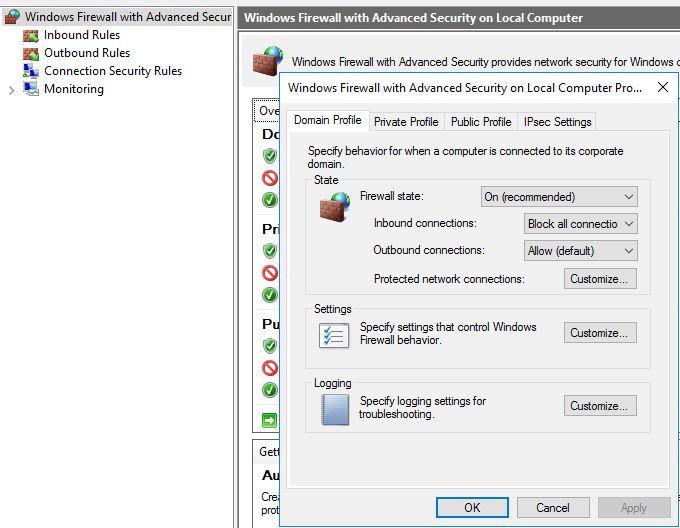
First of I want to make sure that SRV01 don’t answer to anything else but RDP. Default in the Windows Firewall with Advanced Security on Local Computer Properties the firewall is enabled in all Profile tabs. In the State section, Inbound connections is set to: Block (default). This blocks incoming traffic that has not been specified in the Inbound Rules section. Since there are some default openings like Windows Remote Management I will step this up to: Block all connections
The next step is to configure the Inbound Rules. Since I have enabled RDP on this machine I have the default configuration.

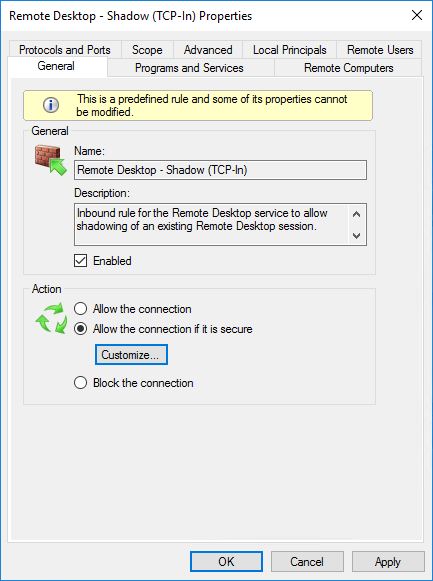
In the Properties of each RDP rule, General tab, Action section I choose Allow the connection if it is secure and hit the Customize button.
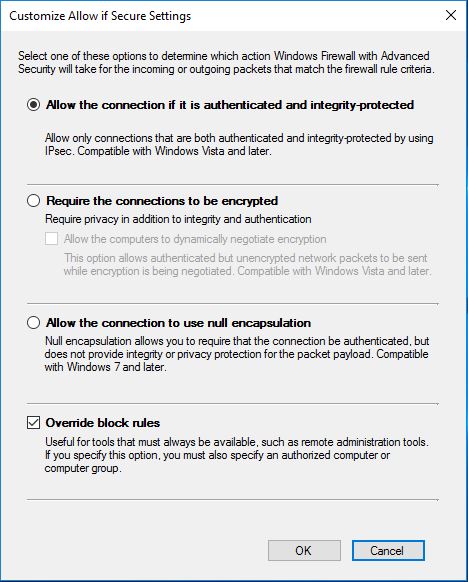
Here I enable: Allow the connection if it is authenticated and integrity-protected, and I also klick the checkbox: Override block rules.
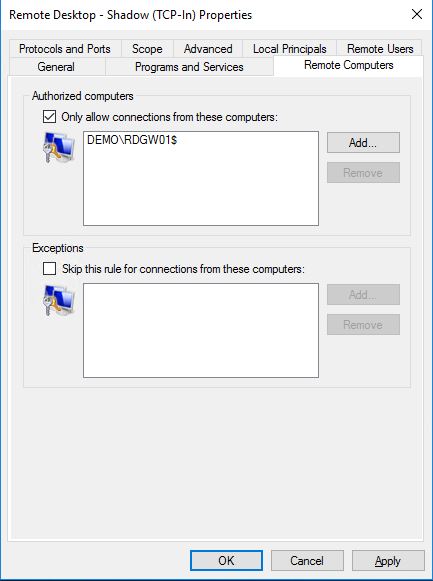
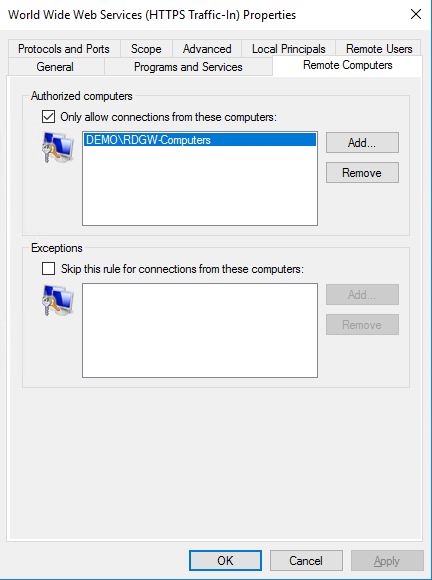
Back to Properties, go to the Remote Computers tab and in the Authorized computers section, check the box: Only allow connections from these computers: and specify the RDGW computer.
Repeat these steps for all Remote Desktop rules. When done, you will see a padlock on the rules.

The last thing to do is to create a Connection Security Rule. By running this command we create a new rule requiring inbound Computer (Kerberos V5) authentication:
netsh advfirewall consec add rule name="IPSec-Policy" endpoint1=any endpoint2=any action=requireinrequestout auth1=computerkerb

All these steps need to be done on the RDGW server as well. The only difference is the Inbound Rule, here we configure the: World Wide Web Services (HTTPS Traffic-In) rule. And in the Remote Computers tab we add the group of client computers we earlier configured in the RDGW who can connect to the RDGW.

And on the client all inbound traffic will be blocked. We only need to create a Connection Security Rule:
netsh advfirewall consec add rule name="IPSec-Policy" endpoint1=any endpoint2=any action=requestinrequestout auth1=computerkerb
Extract from Microsoft documentation: Understanding Connection Security Rules
Authentication refers to the way in which identities are verified before communications begin. A computer can be configured to use several authentication methods. The methods are attempted by each peer in the order they are listed. The two peers must have at least one common authentication method or communication will fail. Creating multiple authentication methods increases the chance that a common method between two computers can be found.
Windows Server 2008 R2 and Windows 7 support several authentication methods, including the use of X.509 and Secure Sockets Layer (SSL) certificates, and the NTLM version 2 (NTLMv2) and Kerberos version 5 protocols supported by Active Directory Domain Services (AD DS). Both the computer and the user can be authenticated. The Kerberos v5 protocol is typically used in a domain isolation scenario to ensure that only computers that are members of the domain, and are thus considered trustworthy, can connect to protected computers. Certificates are typically used to authenticate in environments where AD DS-based Kerberos is not available, such as with computers that run operating systems other than Windows.
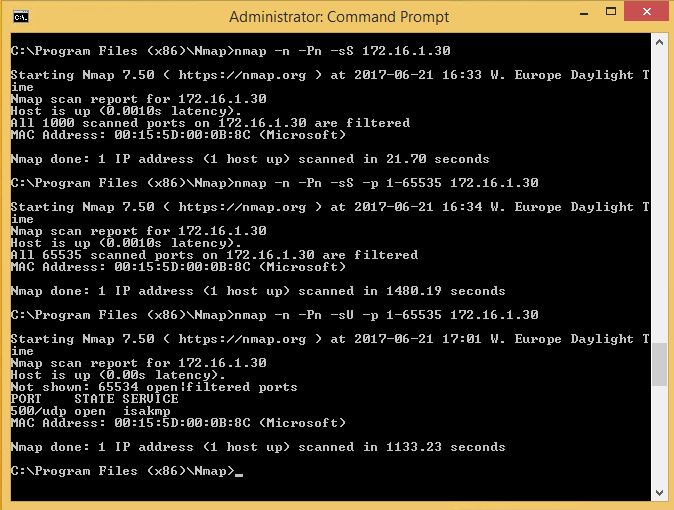
We can verify this by using NMAP and perform a few port scans on the server and it only expose UDP/500. Even if the client is part of the domain, it’s not allowed to see anything.
Basic nmap syn-scan top 1000 TCP ports:

nmap -n -Pn -sS 172.16.1.30

Syn-scan All TCP ports:

nmap -n -Pn -sS -p 1-65535 172.16.1.30

UDP-scan all ports:

nmap -n -Pn -sU -p 1-65535 172.16.1.30
Now were getting somewhere, there are many more things we could add, things like Authentication Policy and Silos, User Rights Assignment policies, but I will save that for another time.
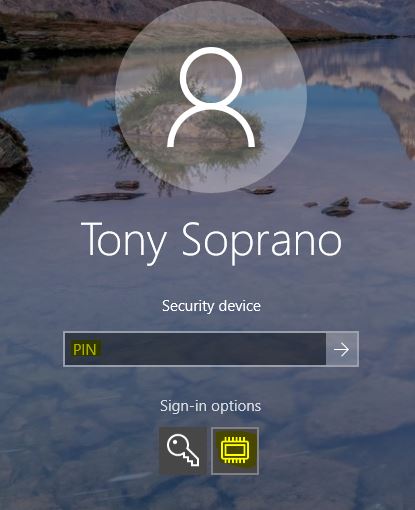
One thing I forgot to say in this scenario is that I have also enabled Virtual Smart Card for the user Tony on his client. This was introduced in Windows 8 and here is a simple 3 step guide if you want to test it: Get Started with Virtual Smart Cards: Walkthrough Guide
With this we could also build something with Authentication Mechanism Assurance (AMA). But I want to keep the track with SSO. Since we are using RDGW I want to add something there instead, like an extra verification step.
Multi Factor Authentication
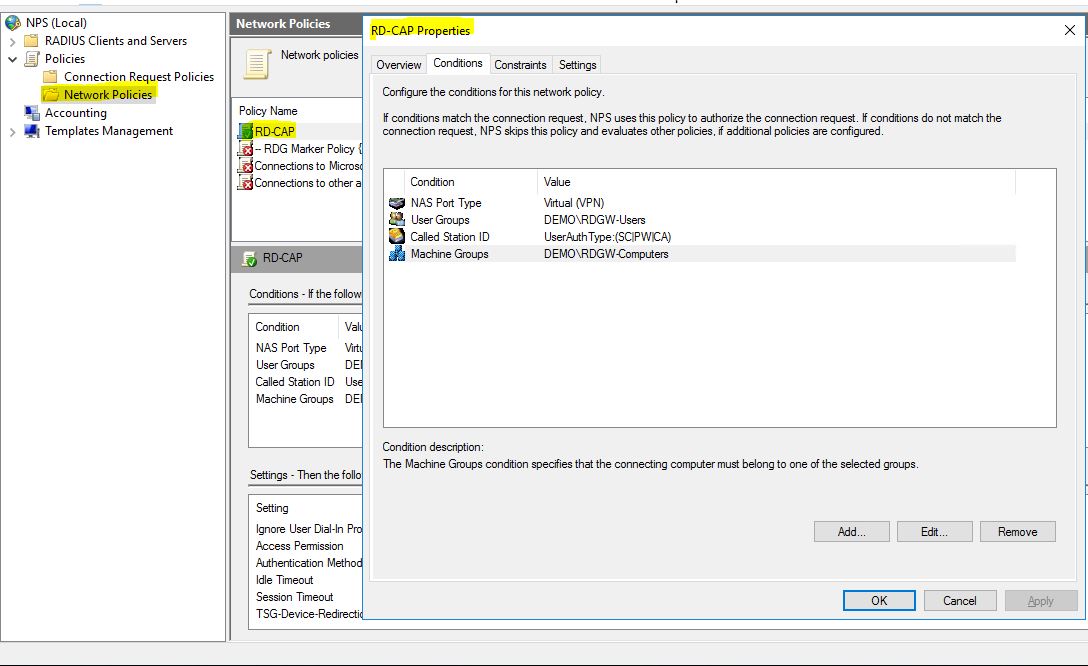
When installing the Remote Desktop Gateway, we also get a local NPS installed on that server. That’s what’s used in the background when we configure a Connection Authorization Policy, a Network Policy is created in the NPS.
With this we can add a Multifactor Authentication Server and create some cool rules. E.g. if a user logon he will need to answer his phone and accept the logon request, or use the Microsoft Authenticator App for Azure MFA. The nice part is that we can also point it to another users phone that needs to approve the logon attempt.
In this example were going to use the Azure Multi-Factor Authentication Server and route our RADIUS requests there and gain a stronger authorization model.
Note: Reading the MS FAQ:
How does Azure Multi-Factor Authentication Server handle user data
With Multi-Factor Authentication Server, user data is stored only on the on-premises servers. No persistent user data is stored in the cloud. When the user performs two-step verification, Multi-Factor Authentication Server sends data to the Azure Multi-Factor Authentication cloud service for authentication. Communication between Multi-Factor Authentication Server and the Multi-Factor Authentication cloud service uses Secure Sockets Layer (SSL) or Transport Layer Security (TLS) over port 443 outbound.
When authentication requests are sent to the cloud service, data is collected for authentication and usage reports. Data fields included in two-step verification logs are as follows:
- Unique ID (either user name or on-premises Multi-Factor Authentication Server ID)
- First and Last Name (optional)
- Email Address (optional)
- Phone Number (when using a voice call or SMS authentication)
- Device Token (when using mobile app authentication)
- Authentication Mode
- Authentication Result
- Multi-Factor Authentication Server Name
- Multi-Factor Authentication Server IP
- Client IP (if available)
To set this up we of course needs to install the server somewhere, its preferred to not be on the RDGW server. You can read this guide to set it up: Getting started with the Azure Multi-Factor Authentication Server
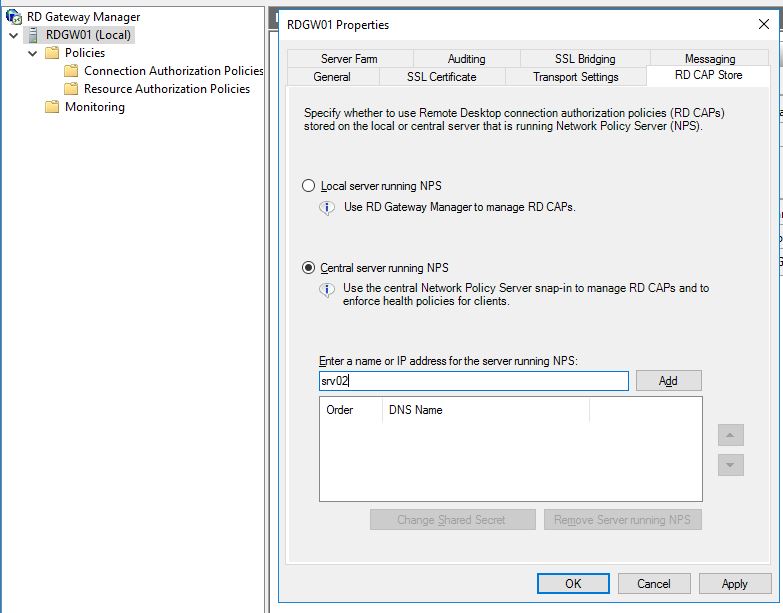
On the RDGW server we need to change the RD CAP Store to route RADIUS traffic to our MFA Server. In RD Gateway Manager, right-klick on the RDGW server name and choose properties. Go to RD CAP Store tab and change it to: Central server running NPS and add the MFA Server and configure a shared secret.
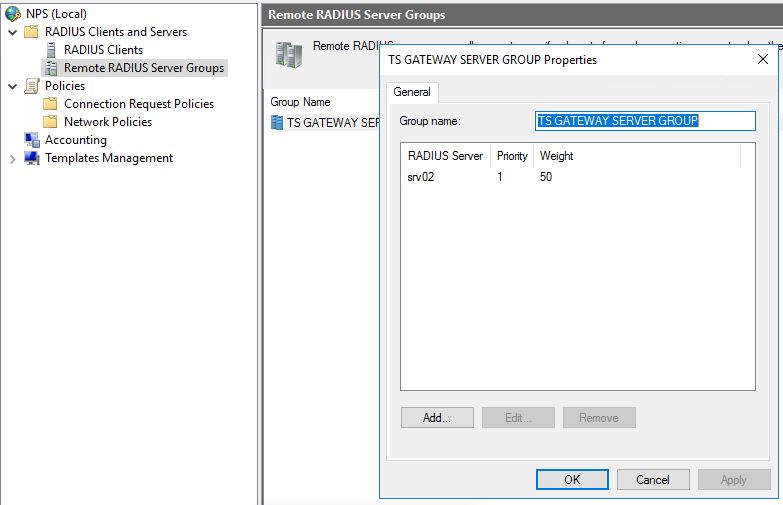
Open the local NPS on the RDGW server and navigate to Remote RADIUS Server Groups and open the Properties window of the group TS GATEWAY SERVER GROUP.
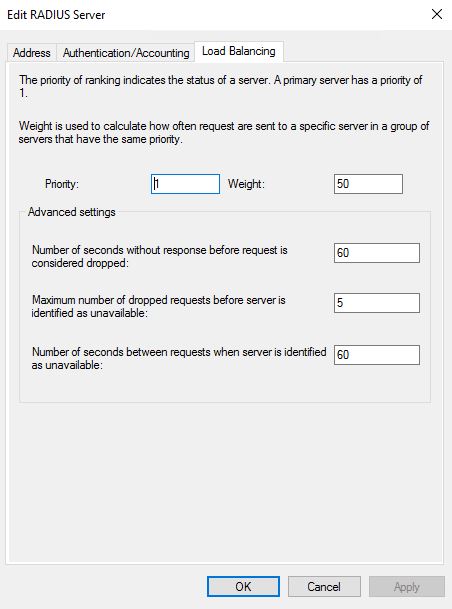
Edit the Radius server and go to the tab Load Balancing. Configure the timeout values appropriately so it doesn’t timeout when using MFA.
- Number of seconds without response before request is considered dropped = 60
- Number of seconds between requests when server is identified as unavailable = 60
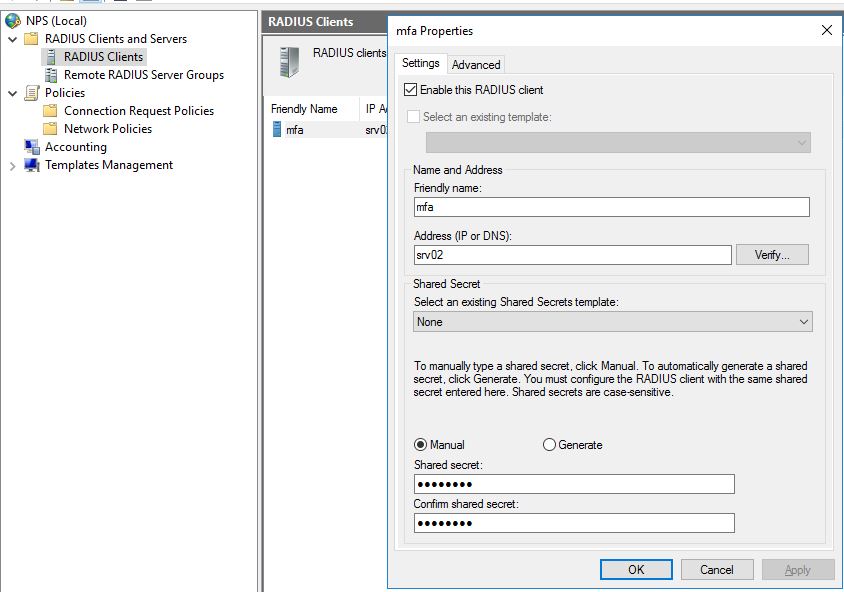
In the NPS Management go to RADIUS Clients and create a new Client. Configure a Friendly name, add the MFA server and the shared secret.
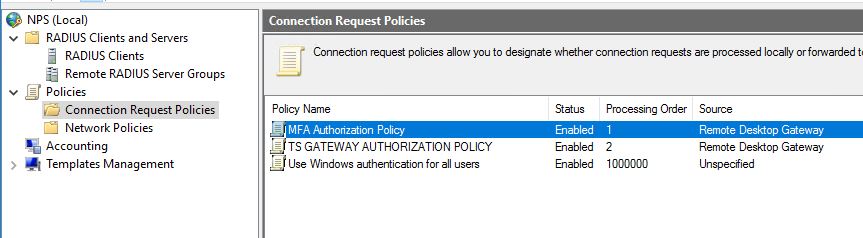
When this is done we also need to create a new Connection Request Policy. We can easily copy the existing TS GATEWAY AUTHORIZATION POLICY, add it as number 1 in the processing order.
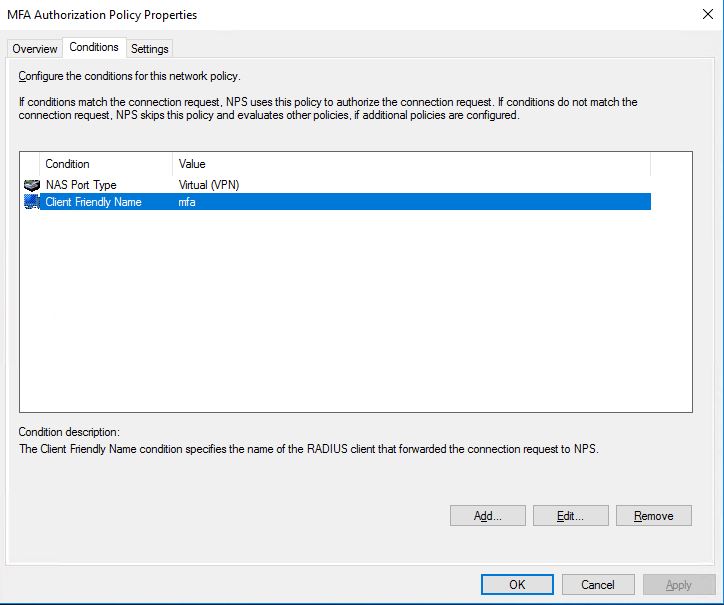
Choose to Edit the new policy, go to the Conditions tab and add Client Friendly Name with the value of the friendly name of the RADIUS Client we earlier created.
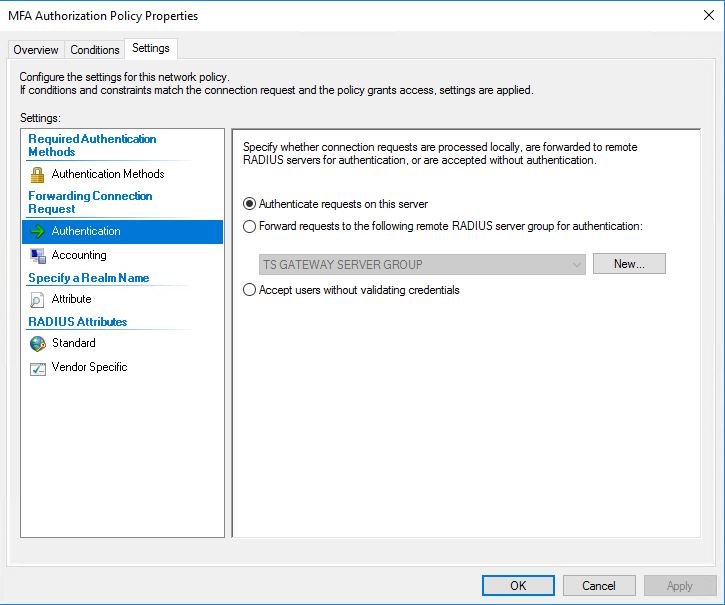
Go to the Settings tab and choose Authentication. Make sure the radio button: Authenticate requests on this server is selected so we don’t create an authentication loop.
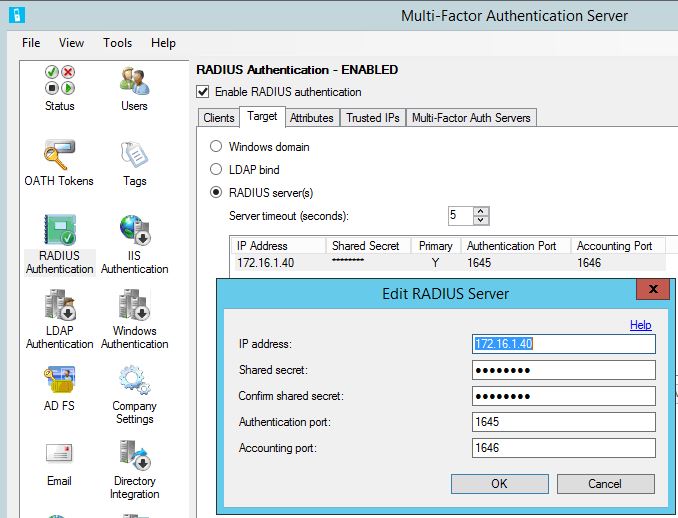
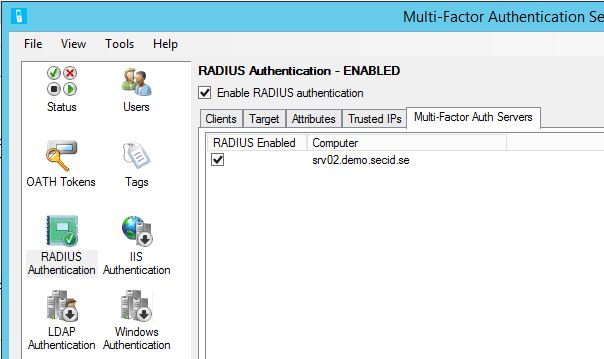
And now at last, we must configure the MFA server. In the MFA Server console go to RADIUS Authentication and in the Clients tab add the RDGW server as a RADIUS Client.

In the Target tab choose RADIUS servers and add the RDGW server.
In the Multi-Factor Auth Servers tab enable Radius on MFA Server.
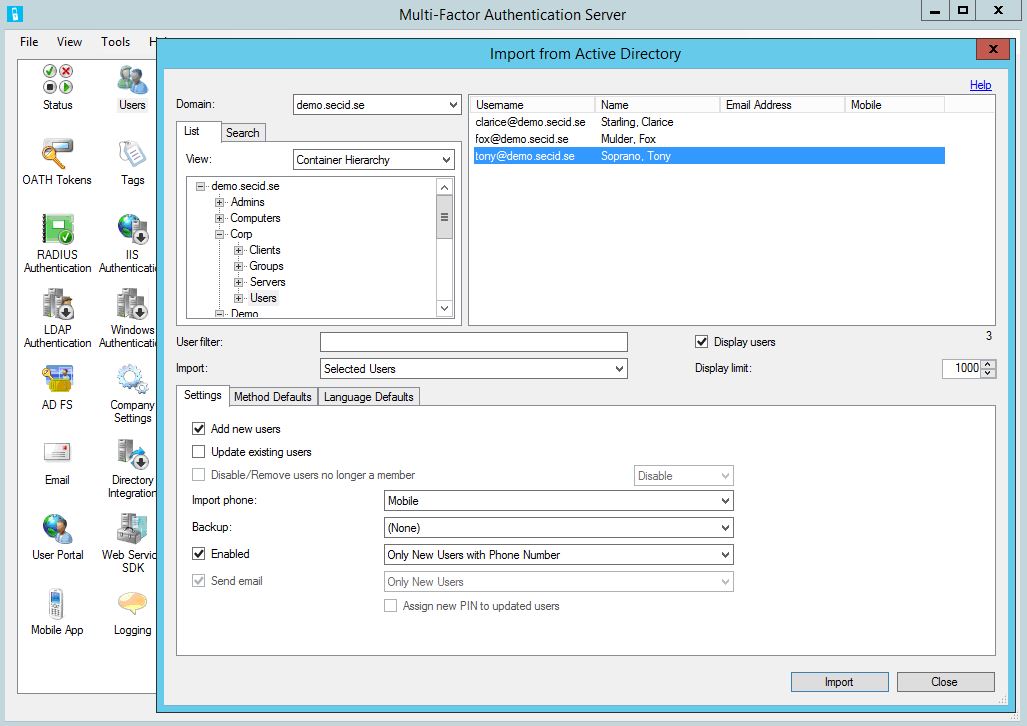
To configure a user, go to Users in the MFA Server console. Here we can choose to import users from our Active Directory.
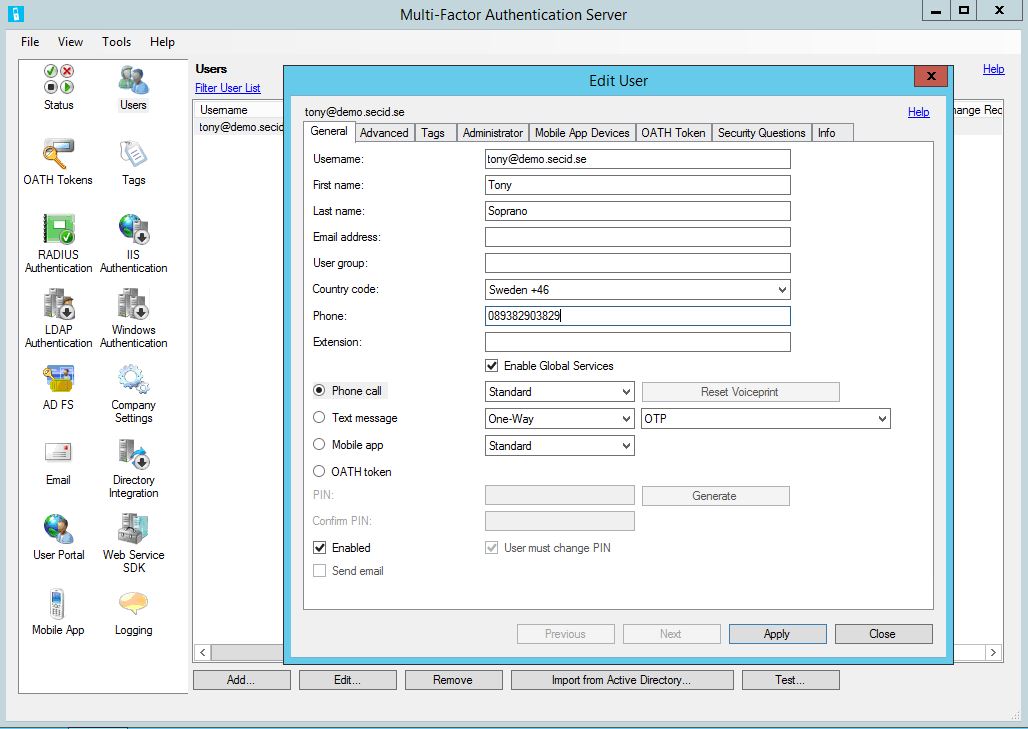
When the user has been imported, Edit the user, in the General tab chose which way the user will be authenticated. In this example I have chosen Phone call.
We also need to configure the Firewall on the RDGW and MFA Server for the RADIUS traffic, but I think you know what needs to be done.
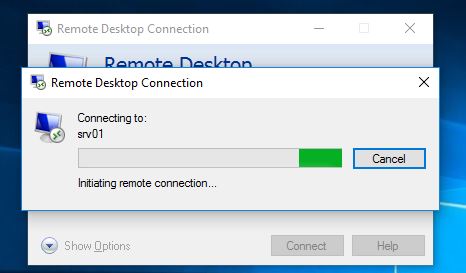
And that’s it. Now when a user tries to connect to SRV01 with RDP, it will halt on Initiating remote connection… and I will get a phone call from Microsoft Verification System asking me to finish the verification.
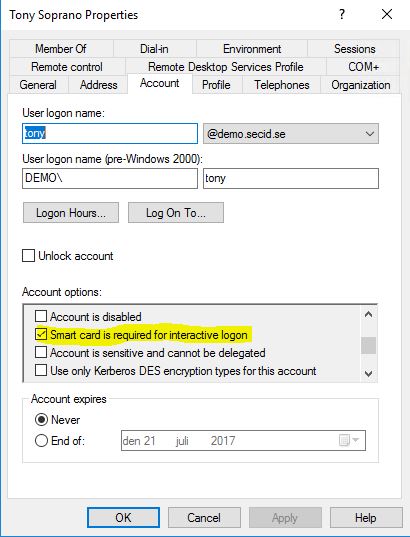
And then I’m in and can manage the Domain as a Domain Admin. I know you must be wondering, end the answer is Yes, you can also have the Smart card is required for interactive logon bit flag set on the user account. Don’t forget the Smart Card password policy.
To wrap this up, we have taken the setup from Part One of this blog series, created a delegation model based on where the user is logged on, he has different admin privileges. We took a few extra steps to protect this channel more by taking advantage of SDI and implemented MFA and everything is still SSO with an extra verification step. We also use Smart Card when logging on to the client.
Next time well have a look at Remote Credential Guard and some other stuff we can use.
Amazing content in both part 1 and 2. Can’t wait for the third!
Thanks a lot for bringing this to community, it takes a lot of time and effort to put this online, appreciate It a lot.
Thank you, Adam, for those kind words. I really appreciate it and that makes all the hours’ worth it.
Part three will be up soon, I promise!